Friday, 7 January 2011

Beauty Shots, Prop Sheets & Texture Sheet

Today I have been focusing on getting all of my beauty shots done as well as getting the prop sheets done as well as the texture sheets. Before today i wasnt what I would have done. I am pleased to say that I have evrything done and I am pretty pleased with the final outcome.

Texture Sheets

I wasnt sure how I was going to present my texture sheet when it came to the buildings because of the amount of textures I had and the different sizes they were. I knew that for my props I could present the textures within that sheet but It would be different for the buildings. I couldnt find much on the internet on how to lay building texture sheets out until Danny Bannister suggested I looked at a certain picture which showed how someone else had set theres out. I looked at the image and really liked his layout, so by using his as a template I made my own by putting all of the textures within a 4096 x 4096 canvas. Within this 4096 x 4096 canvas I layed all of my building textures out and the size of the textures didnt matter because they all sloted together.


As you can see from the image above all the textures are different sizes and you can also see where I have used tiling textures. The one thing I do like about laying out my textures this way is that even if the texture 256 it still fits nicely into the sheet, so nothing looks untidy. I also found this really easy to do unlike what I thought it would be, It was simply just a drag and drop operation and didnt take as long as I first thought it would have. I will be definetly be using this technique for texture sheets in the future.

Prop Sheets

For the props the idea of doing the sheets was easier until it came to the time to do them. I have a sheet layout I was going to use which I talked about in proffesional practice, but after I did this with some of my props I didnt like the presentation as much as I first thought. So I went back to looking at how other people had presented there props and I came across quite a good few. I have noticed that when presenting props there is only so many ways you can do this, but I think if you can present everything else a little differently then it draws they viewers eye around the whole layout of the prop other than just looking and thinking same old same.

Above is the prop layout I have decieded to use for all of my props. The sheet layout have the standard two shots of the prop from different angles. I have also included the title of the prop, how many traingles have been used and also the texture size used on the prop. I have also included the maps and the way I have done them I thought was different and also worked. I have the normal map layed over the diffuse and the same for the spec which allows you to see all three at the same time which saves space and time. Besides all this I have a short description on how the prop would be used in game. I think they way I have layed the prop out shows the standard stuff like having different angled shots but I have added my own unique ideas to the sheet to make it my own.


I have done the same for all of my props. I have used the same prop sheet and just changed things where nessarcery. As you can see on some of the props sheets there are more than one model. I have done this because after looking at some  peoples prop layouts, they use a full sheet for one barrel which to me doesn't make sense if you can put more props on the same sheet with the same style. I have done this for my barrels, the wooden props and also the extra props. I did this because I thought that It would be a waste of space to put them on there own sheet when they work just as well with other props. On the plus side the sheet doesn't look as boring and you can look at more on one sheet instead of flicking through loads.

Beauty Shots

The most importanat pert of the assignment was to get the beauty shots perfect and give them the justice they deserve when shown. In total I have 4 beauty shots, within these shots there are models which are Dannys and models which are my own, because Of this I have also done 2 short videos that fade Danny's models and just leave my own So you can understand who has done what. I have also just took 2 beauty shots that include both mine and Danny's work together to show you the level as an whole seen as we did it in a group.

The first thought that came into my head when doing these beauty shots was where should I take them. I knew for definte 2 of my shots but I wanted 4 so you get an idea of the environment just from the shots. After playing with the cameras I got the 4 shots that I wanted and I was really happy with them.


The shot above is one of the 2 I knew I was doing. I like this shot because it basically shows you the whole environment. It also shows you how much work has gone into the environment. The main thing I like about this shot is it shows you how the depth of field is working and how also the fog plays a big part in the environment. When I look at this shot I could see it on a loading screen just before you may enter the level.


This is my 2nd shot I did this shot because I wanted to show that other than the buildings there is props that are in the scene which can be seen at the back. I Also wanted to show all the graffiti on the walls which I think gives the environment a really grimey feel. I think that the car in the middle which was modelled and textured by Danny gives the shot justice on how this environment should look, basically worn out and grimey.


This is the third shot and I choose this shot because again you get to see how bad the city has become. You can see all the buildings that are worn out, the car and props on the right. I also like the smoke effect which is in the scene which Danny put together. I think the thing I like about this the most is the sun, this is because the sun cant even penetrate the grime of the environment. You can see the sun all bright and vibrant but beside reflections on models the environement still looks wor out which is exactly like the film.


This is my final and favourite shot off all of them. I think this because you get to see a variety of things in this shot. You can see slight smoke, all the props and all of the buildings. I also think that the lighting works really well in this shot because you can see all the shadows close up. When looking at this shot it reminds me of Gears of war which to me is a good achievement.

Fade In & Out Videos

Although this project was a group project Me and Danny only thought it was fair to show at some point which work was done my each indivdual. So i thought I would 2 of the beauty shots above and have them fade in and out so you can see exactly what I have modelled and exactly what Danny has modelled. They are only short videos but it gets the point across. Everything that turns black within the videos is what Danny has modelled and everything else is mine.


As you can see from the videos above both of us put a lot of effort into this project. Me personally am really happy with the outcome of this project, If I thought that the project would have looked this good at the end then I would have been happy then, but now that its done I am happy because it exceeds what I was expecting and also along the way I have learnt so much that I can use on other projects.
Extra Beauty Shots

Considering this was group project for myself and Danny I thought Id better put up some beauty shots that shows off both parts of our work at the same time. I think these shots show the sheer size of the environment and how many hours have being put into this project.


Conclusion

I think that when we told everyone what we were doing for our project some people thought that will look good if you can get it all done within the timeframe. Me and Danny felt confident in ourselves that we could get this project done on time and be happy with the final outcome. I remember doing a presentation and we hadn't textured anything and at this point me and Danny knew we were falling behind but after many late nights we have finally finished the project.

Myself I am extremly happy with the project and it didnt stress me out as muchas I first thought it would. I think that me and Danny worked well as a team and also working in a team doesn't scare me as much as it did before the project because I know when you get your head down the work gets done.

If there is anything i would change on the project it would be the fog, and i say change I wouldnt change the fog I would just liked to have been able to play around with different types of fog, but because of time I didn't have the chance. I would like to thank Danny for also working on this project with me and also everyone that helped us when everything was going wrong. I have really enjoyed this project although I wont be lying when I say ill be glad to see the last of it.

Thursday, 6 January 2011

Xmas & New Year Work

Over the xmas and new year period I have been mainly focusing on getting the children of men finished and ready for beauty shots. In the last post I had props and models untextured and I also needed to model some extra walls for the back off the environment. I have now done this and I would say that the environment is basically finished except the photos I will be posting are not of yet my beauty shots. Some of the Shots you will see may end up as beauty shots but as of the minute I am unsure.

So since the last update I have

  • Remodelled the phone box
  • Textured All props
  • Added some wall to the back of the environment
  • Remodelled parts of buildings
  • Textured All Buildings
I have also done some tutriols that I havent used within this environment because of time issues or just because I wasnt were I wanted to be with the tutoriols. I have attempted fire with smoke which for a first attempt didnt come out too bad but I gave up that because it was something we could add at the end if needed, which Dan actually did. I have also learned how to setup cameras for my  beauty shots.

Also I have been latley looking at fog for another project and how there are many different styles of fog, We could have used this in our scene but I think our scene looks fine at the minute so I didnt mess with it.


These are shots of the finished environment and some of these shots may be used as beauty shots some may not, Obviously for the beauty shots they will be presented with a title and name. I will also be doing another 4 beauty shots but these will be the exact same but Dannys models will be all the same material so you can see what I have modelled.

There will be one more post after this one that will include everything that will already have been sent. I will be doing 4 beauty shots. 4 with dannys models blacked out 4 not, the beauty shots that are blacked will include annotations. I will also be doing a building texture sheet with every texture I have used on the shell of the buildings.The final thing will be props sheets, I will be presenting all my props in house style with texture sheets and information about them. This post should be in the few days and will be the last post

Friday, 10 December 2010

Week 10 Texture Follow Up

This week I just carried on texturing our scene so we could get as much done before we leave for christmas break. Im hoping for next week that the majority of the buildings are textured and that me and Danny agree on how the textures look. When these buildings are done and textured and were happy with the outocme then I am going to start texturing the props and modelling some more small props as I'm doing this.


The shot above is at the begginning of the scene and is a very dull scene. I think I have captured the mood in the shot as you can see it looks cold and misty.


The other 2 shots show you how the environment is devolping as I texture more of the scene. I am hoping for next week to get all the buildings done so i can take the break over christmas then have 3 week to do the props and add and change things.


Friday, 3 December 2010

Week 9 (Texturing)

This week Me and Danny have been focusing on getting as much texturing as possible done. We focused on the buildings so we could start to see what the scene was looking like, I focused more on my buildings and Danny focused on his.

I startesd with the row of my buildings which makes up one side of the scene, I havent textured them all just yet but I got most of them done. I also did the big building which was really just 2 tiling textures, but I think it came out better than we first thought.


Abover are basically what I have textured. Danny has done more of the other buildings but im sure there in his blog. We aim to have even more doen for next week and then hopefully have all houses textured then we can discuss what needs changing and how we can make it better

Friday, 26 November 2010

Week8 (Texture Start)

This week I spent my time gathering refernce for texturing. I have also started texturing bute evrything has really been just to test the textures on certain buildings. I have also been playing with crazybump a lot this week to try and get the best results from the maps I am applying to the models.

My main aim for this week was to get one building in our scene textured so that i knew the tiling textures would work on all of the buildings. As I was doing this Danny researched vertex painting and actually started painting the floor for our scene.


Above is the 1st house I textured using different resoultions where neccassary. I think that this building is probabily one of the least seen buildings so the texture resoultions range from 128 x 128 up to 512 x 512, In game it also looks really nice, the bricks and tiles are popping out really nice and when combined with the textured floor myself and Danny can see a gears of war feel to the level.

My aims and objectives for next week is to carrying on texturing the scene and get as much texturing as possible done.

Friday, 19 November 2010

Alpha Presentation

This week our main task was been ready for the alpha presentation, we already knew we had enough work to present but for ourselves we wanted certain objectives ticked off our list. The first one been making sure all main buildings and props were modelled and UV'd and that all of the other stuff was at least modelled. We surpassed ourselves in this task because everything in the scene was ready for texturing, we also wanted all the light maps in the scene and working which again we got done for the alpha, an extra which we didnt think we would have done for the alpha was getting the post processing looking as good as it does at the minute.

When presenting the presentation I was pretty confident that it would go really well, i felt like I could anwser any question that was asked about the level and I felt like I already knew what needed doing to make the level better. When presenting the presentation I thought It went really well, we reccaped to the class on which scene we were doing then we showed our week 2 blockout again, from this we went on to show a screenshot of where we were now with the work. We then went on to talk about the problems we had overcome and what we did to fix the problems, also we showed where our beauty shots were going to be taken from.

After the presentation we then showed the class our level on one of the lab machines, I think the class were pretty happy with the amount of work we had done so far and gave us pretty good crit towards our work, our tutor told us that we had done a lot of work but we were behind when it comes to texturing which I totally agree with, so our aim as a group next week is to start texturing and to make the scene come to life

Friday, 12 November 2010

Week 7 Alpha Preparation

For week 7 mine and Danny main priority was to get everything ready for the alpha presentation which is due the week after. We both knew that we had done enough for already for the alpha but we wanted to get as much done as possible, We both agrred that for the alpha we wanted all the buildings modelled, Uvd and ready for texturing, we also agreed that we wanted a lot of the props in the scene so our class gets a feel for the environment, I carried on modelling and putting props into the scene, there is a lot more to be modelled but for the alpha you get the basic idea of the scene.

As you can see from the shot above all of the light maps are working very nicely and alos Danny has setup the post processing chain which enables us to have ambient occulsion and also other nice effects like depth of field and the fog which is turned on, we have also added a default skydome for the alpha that will be changed in the future.

One thing that has been a success this week was blocking off all the open areas, for the past few weeks we have been debating how we could block of certain areas without it looking really bad, so this week Danny has been using assets and props that have already been modelled to do this,

The shots above are just other angles of the map so far, there is a lot more of the map that will be shown for the alpha and were hoping to give a walkthrough of the map other than just screenshots, were hoping for next week to give a good and proffesional presentation to the class and were hoping to get postive and constructive critcism.

Friday, 5 November 2010

Week 6 UDK Import & Light Maps

For this week my aim was to everything that I had done into UDK with all the packages sorted so danny can use them. I also wanted to do the light maps for everything so I can see how they are looking In UDK, and also to work out any problems if they occur.

So Over the week I modelled up to 10 small props so I could start filling up ceratin areas of the scene to make it look more realsitc. The props were nothing major ,kettles, phonebox, street lights, etc but they all make the scene look a lot more realistic.

Below is a few shots of the scene in UDK


As you can see from the shot above there is a lot of issues still to sort out but the light maps are working at the minute which is really good. At the minute that scene is subtractive and we are going to change it to additive so the light maps work even better, also the shot above is just of what I have modelled so when Dans buildings also get imported it should start looking really nice.


The shots above are just other shots of the scene so far so you can get a feel of the environment, I am hoping by next week that all of dans props and buildings are in the scene, and I would also like to have a skydome in the scene so that the scene looks like its coming along.

So my main aim for next weeks are

  • Skydome
  • Mine & Dans Props & buildings in scene
  • Additive scene
  • Better looking light maps

Friday, 29 October 2010

Week 5

For week 5 my aim was to get all the models I had done so far UV'd and ready for texturing. The way I have worked through out the project so far isn't really the best way of working because I have been Uving all my models at the same time which I have worked out isn't the best way of doing things.

I started Uving all the buildings on the Monday of week 5 and I finished them all on friday. I did take 5 days but now that the UVs are done I feel im ahead of work, there is still loads of buildings and props that i need to model but i will be UVing them as I go along from now.

Below is A shot of the scene UVd


While I have be doing the UV's all week Danny has been working on the other half of the scene by doing some of the buildings. He has done the 2 biggest building in the scenes and they have all been UV'd. By Danny doing the buildings we now know the sheer size of the map and what needs to be done as soon as possible. Me and Danny have disscussed the scene and we are aiming to get all the models done by the Alpha which is week 8.

Below is a few shots of the map so far, we have coloured the buildings so u can see who has modelled what, the buildings that are brown are the ones that Dan has modelled and the yellow ones are all mine,


As you can see from the shot above there has been a lot of work done so far and everything in that scene do far is UVd and ready for texturing.


The shot above is how were hoping the player of the game would see the environment from. We are doing the game from 3rd person so obviously this would include the charcater as well as the scene and also the car Dan has already modelled.

For next week I am hoping to start modelling some of the props within the scene because from the past weeks blogs all the rendered shots all contain buildings and not enough props. I am also going to start rendering all of my shots in UDK from now on because it looks a lot smoother than the shots in Maya.

So overall for next week I want more props in the scene which will all be UV'd and ready to texture and Im hoping that Danny has the floor modelled and UV'd because I know he is currently doing it, also we want to test light maps to see if they are working right with our scene, Id rather know now if there is something i need to change rather than later.

Friday, 22 October 2010

Week 4

For week 4 my aim was to carry on modelling more of the scene in maya and maybe try to put some of the scene into an unreal package, In week 3 I had most of the starting building's already modelled but i wanted all the building's behind and on top of these modelled for this week.

I started out by finishing some of the scene from last week and adding some of the background buildings to give the scene some perspective, I also started modelling some more seperate buildings which attached further on down the road, I did this because Danny was wanting to also model some buildings and the way we have split up the scene is like two seperate scenes, so for him to start his side of the scene I had to model certain buildings for him to connect his to.

Below is a quick rendered shot of how far into the scene we were on tuesday of week 4


The image above has the main tower of the big building which isnt in this rendered shot, I modelled the tower and small building next to the tower so i could get the scale right for the big building which is the main building you can see in the scene.


My next plan for the week was to try and put the scene above into unreal to see how it plays at the moment so I can see if all the scale was right and to see which parts I can use as modular pieces, also to start a package for the scene so we can re use certain props through out the scene.


Once the scene was in unreal I was happy with the scale and how the scene was coming along, as you can see in the unreal shot above i had modelled the main building in the background which gives a really nice perspective and when it has the height map fog in the scene it going to look really nice.

Also at this point which was the thursday Danny had finished his car and also modelled the post box prop which will probabily be on Danny's blog.


The rendered shot above is the latest render so far, Everything in the scene is ready for unreal and is all to scale, they are clean models and ready for Uving, i work really different and should stop uving after everythings done out of my system but that is my main aim for next week to get everything so far Uv'd and ready for texturing when needed.


This is the same scene just from another angle, the houses on the left are terraced houses which all look the same but I will make them look different by putting more grime on certain houses to make them look older than they are. Also in the render where the huge empty gap is, is where Danny is starting his buildings and also the damaged car has to be put into the scene.

For next week I hope to have most of the buildings that are not in the scene in there and also block off certain areas. I am also guna start modelling certain small props to cover the street with e.g petrol cannisters and rubble. My main aim though is to get most of buildings Uv'd and ready for texturing because I know that this is going to take a fair bit of time.

Thursday, 14 October 2010

Week 3

For week 3 myself and Danny decided to get started on the models for the movie scene, we both decided that I would start with the buildings and that Dan was going to start modelling the burnt out car. I went ahead and started modelling some of the first parts of the scene because it's a good starting point and I also knew that once I had one building scaled right all the rest of them would just follow.

I started with the building that you see in front of the tunnel at the begginning of the scene, I did this building first becasue I knew once i had modelled the building to scale i could connect all the other buildings I would model and I wouldnt't have to worry about size issues, another reason was there was buildings on both side's so i could start to make the scene come to life.


These were the 2 first buildings that I modelled and I knew that once I had tweaked the buildings then the rest would follow very easily, at this point I disscussed with Danny whether i should carry on modelling that part of the scene or whether he wanted me to start on some props of some sort, we both agreed that carrying on with the area I was modelling would be the best because then the models would start to look like the movie scene.


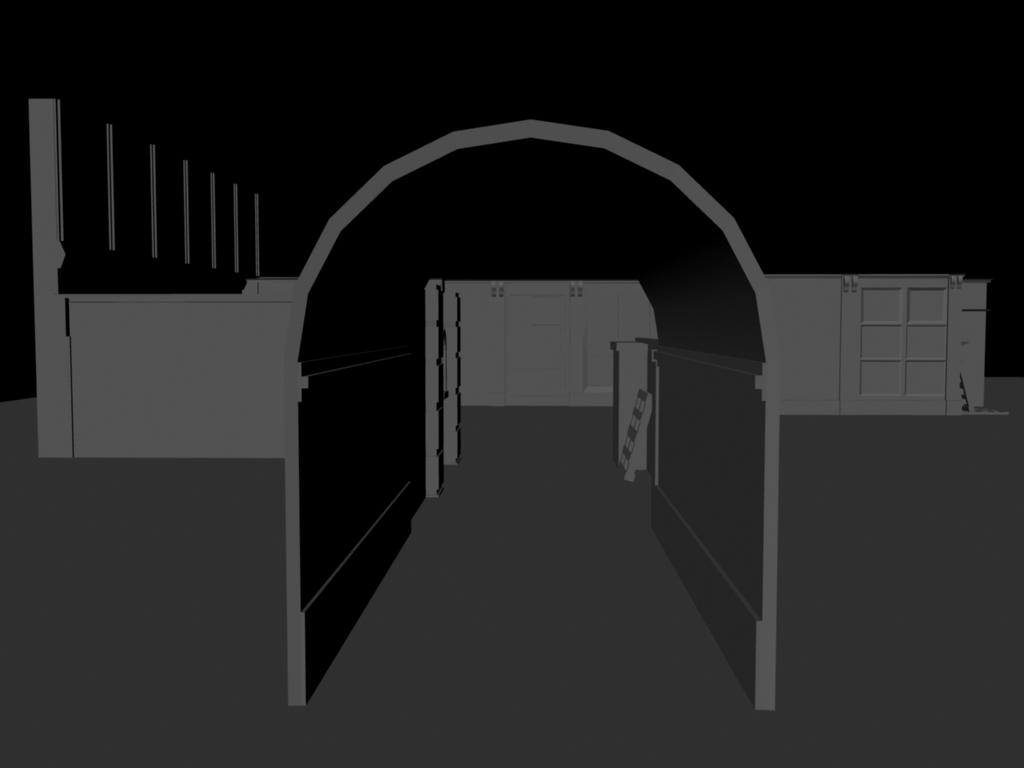
To the left and below are renders that i have put together to show how far into the model we are, I have modelled most of the ground buildings but there are still buildings that attach to the top of them which are currently missing.

I have also added a few props just to try and get a feel for the scene so there some pallest scattered around and the crates under the old market store, and i think that when this part of the scene is textured it will look really nice.

When I had got to where I am now the first thing I did was import the models in to UDK to check if the scale was right and if anything looked out of place, I did this and everything was fine except the size of the door which has been changed.


 The plan for week 4 is to carry on with what wehere doing but we hope to have the damaged car in the scene as well as all the buidings that are on top of the ground floor buildings which will then give you an idea of how the scene is going to look when finished.


Thursday, 7 October 2010

Week 1 and 2

Week 1

In week 1 we was told what to expect from this module and how the module was set out, we were shown our module handbook and out tutor went through the requirements that were needed to pass this module. We were told that the assignment 1 was to create a scene from a movie either on your own or with another person and assignment 2 was to keep an up to date blog of progress.

I decided to work with Danny Bannister and we decided on doing the film Children of men. For the second week we were told to get a presentation ready for the next lesson which explained what movie we were doing, how we researched the movie and the time plan we had set out to complete the assignment.

We decided on which scene we were doing and we both decided it was a great scene to do because it contained vechiles which Danny wanted to, assets which i was intrested in and the environment which we were both intrested in. The video below is the scene we will be doing.


Week 2

In week 2 me and Danny started putting our presentation together, and started researching different kinds of factors for our scene. Danny concentrated on real life reference e.g. Bosnian war and the Chechen war, where as i was researching the other kind of films and games that had a similar feel to the scene we were doing, e.g. Fallout, gears of war and uncharted 2. While I put all of the presentation together Danny created a rough block out of the scene to let the audience get a  idea of the scene we were doing. Also in the presentation there was information on how we would use our time to get everything done efficiently and also there was mood boards of props and environments.


On the day we presented the presentation we explained everything really well and at the end of the presentation there were no questions asked, so I assumed the idea was clear and everyone agreed it was a good scene to do.

In week 3 we are going start modelling some of the environment and some of the props, Danny will start modelling the rubble and other assets, were as I am going to be focusing more on the buildings. We hope by the end of week 3 we can start to see some good development in our work and see the scene coming together.